Texture Grunge Flowers or…Where should I put all those Canvases?

Another Canvas…I can’t stop creating them…which is …well not bad perse…but seriously…LOL. where should I put them all….sigh….

This one is 12×16 inch – I had a wonderful time creating all the texture and those flowers.

It was one of those pieces which I loved in the beginning- having a picture in mind

and then started to HATE it…not kidding- painting it all over – disappointed I ruined with one step what I had liked so much

But now I love it even more…maybe because I had this fight…just like with everything in life, right? Things that come to easily to you, you do not really cherish, things you struggle to achieve are the dearest milestones in your life.

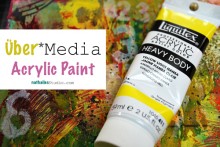
Supplies: Canvas, Sewing Pattern, Gerstaecker Gesso, Liquitex Gel Medium, Liquitex Heavy Body Acrylic Paints, Crafters Workshop Stencils, Ranger Dylusions, German Scraps, Lascaux Struktura, Liquitex Acrylic Inks, Paper Clay, Prima Canvas Buttons, 7Gypsies Tissue Paper

Have you had a fight with a project recently and love it now the more?

Nat

Lullaby Canvas or I better post this later in the day ;)

Some very good friends of mine have a new addition to their family  – I am sooo excited for and with them 🙂

For the little one I made this Lullaby Canvas – truly hoping they will like it…cause …I am sure the little one will not start throwing its rattle against it…or maybe it will? LOL

The canvas was inspired by the amazing Sue Pelletier and an old German Lullaby song “Weißt Du wieviel Sternlein stehen?” which means translated “Do You Know How Many Stars There Are?”

Here is the song for you…please do not listen to it before you finished your day tasks- LOL- remember it is a Lullaby song and I don’t wanna be responsible for your head falling down onto the keyboard…;)

weisst_du_wie_viel_sternlein_stehen

ah …you know…I better make this post an evening post 😉 …oh wait…evening in which part of the world? ….LOL

I used heaps of paint media – eager as always seeing how they work together 😉

PaintMedia: Liquitex Gesso, Derwent Inktense Blocks and Derwent ArtBars, Liquitex Acrylic Inks, Liquitex Heavy Gel Medium, Liquitex Super Heavy Body Paint  – FUN!

It was fun to work a bit more with burlap – I love that material and a new material for me: paper clay- which is what Sue Pelletier is very well-known for. Love the possibilities of this. The rest is old news…some tissue paper, metal pieces, wire, ephemera, fabric, canvas fabric and yet putting it all together and getting excited each day as a project evolves is fun. And my fave is thinking I make this for friends I love during the process. This canvas is full of fun memories of times I spent with the amazing parents of the little one. I so miss them here! Now hope they don’t read my blog- LOL- because the package is still traveling overseas.

Speaking of Lullabies…which comes to your mind?

Wishing you sweet dreams tonight 🙂

Nat


Tim Holtz’ 12 Tags of Christmas – Tag 2

Loved Tim’s second tag– the frayed canvas layered on grungeboard was a great idea 🙂 I took my own spin as I had a lot of those supplies not handy.

As I don’t have the resist paper he used, I made my own by simply gluing down book paper on the tag and then using Golden Tar Gel over a Snowflake Stencil. This is what comes next for me to all the coating that is used on those resist papers out on the market. But thicker Gel Medium works also very well.  I then painted the background with some watered down white acrylic paint- which looked a bit different from the used Distress Stain of course- but I still like the outcome- it adds some dimension to the tag.

Supplies: Distress Inks, Sizzix Die Tag, Book Paper, Golden Tar Gel, Tattered Angels Snowflake Screen, Golden Gel Medium, Tattered Angels Glimmer Glaze, Untreated Canvas Fabric, Crafter’s Workshop Start Stencil as a Template, Grungeboard, Scrapbook Adhesives by 3L Foam Tape, Tonic Studio Distress Tools, Texture Hammer, Vintaj Metall Star, Beacon FabriTac, Eco Green Crafts Acrylic Paint, Burlap, German Scraps Border, Prima Rhinestones.


Tomorrow I will show you my newly organized studio 🙂 …well part of it–hehehe. Looking forward teaching tomorrow here in Hamburg – it is going to be fun! Last Workshop of this year in person 🙂

Nat

Tattered TV – Us Layout- Video & Tutorial

Thank you to all of you who joined me from all over the world (Germany, Singapore, USA, France, Spain, Greece, The Netherlands etc.) yesterday in the Tattered TV Show – even some people joined me two times- since due to some confusion with the winter time 🙂 Europe already changed the clocks last weekend while in America you do it next weekend, so we had all the times wrong in our newsletter. But hey…LOL…good thing I’m flexible 😉

Vielen Dank an alle, die gestern aus aller Welt (Deutschland, Singapur, USA, Frankreich, Spanien, Griechenland und den Niederlanden etc.) bei Tattered TV reingeschaut haben. Es gab sogar einige die beiden Shows angesehen haben…ja- da ja bei uns die Uhren bereits letztes Wochenende auf Winterzeit umgestellt wurden, aber in den USA diese erst nächstes Wochenende umgestellt werden, waren alle Zeiten falsch und unterschiedlich angegeben…wie schön, dass ich so flexible bin 😉

If you missed the show- don’t worry- I recorded it – and you actually get the first version – clean hands and clean surface in the beginning included.

Falls Ihr die Show verpasst habt- keine Sorge- ich habe sie aufgezeichnet – und zu Eurem Glück auch die erste Version – also saubere Hände und sauberer Arbeitsplatz am Anfang .

Here is the Video:

Klick 🙂

I showed how you can use Chalkboard as a stamping medium and also some different ways on how to use all four of the Tattered Angels Paint Glimmer Mist, Chalkboard, Glimmer Glaze and Glimmer Glam and did show how you can use the different specifics of those products and make it work for different techniques and how you can mix them too.

Ich zeige, wie man Chalkboard als Stempel-Medium verwenden kann und darüberhinaus, auf welche Weise all vier Tattered Angels Farben Glimmer Mist, Chalkboard, Glimmer Glaze und Glimmer Glam verwendet werden können. Die unterschiedlichen Eigenschaften all vier Medien und welche Techniken sie unterstützen können, aber auch wie die Medien miteinander vermischt werden können.

Here is the tutorial in English as a downloadable pdf Tattered TV US Tutorial – I hope you like it 🙂

Hier ist die Anleitung in Englisch als PDF-Download: Tattered TV US Tutorial – Ich hoffe es gefällt Euch 🙂

Until next time on Tattered TV on December 21 st, 2011 !

Bis zum nächsten Mal auf Tattered TV am 21. Dezember 2011 !

Nat

Homedecor Canvas

Lately I have been playing on bigger Canvases – love it – giving me so much more room to play with texture…only…where to put it- LOL. The Canvas was part of an article I wrote about the Canvas Corp. Products in the Fall ScrapArtZine.

In der letzten Zeit hatte ich sehr viel Freude mit größeren Leinwänden zu spielen – ich liebe es-  es gibt mir so viel mehr Raum mich mit Textur auszutoben…nur…wo passt das noch hin – LOL. Die Leinwand ist Teil eines Artikels über die Canvas Corp Produkte.

For the background I used different kinds of coarse paint media- like gesso with sand and speckeling paste. I sprayed the background with the Limited Fall Edition Glimmer Mist by Tattered Angels.

Those awesome canvas and bulap banner pieces by Canvas Corp are so fun to play with either as Homedecor times or for an album. I used a Pink Paislee Mistable Screen on top of the canvas banners. The Letters are from Tattered Angels.

For the flower I used some yummie Prima Lace and in the middle- hard to see I placed a self made denim brad. So beautiful how all those products work together 🙂

 
Products used:

Acrylic Canvas Flower Tutorial

In one of my Layout-Workshops from last year I taught how to create those Acrylic Canvas Flowers and I thought I should share with you 🙂

In einem meiner Layout- Workshops vom letzten Jahr habe ich gezeigt, wie man diese Acryl-Farben-Leinwand-Blumen macht und ich dachte, ich zeig Euch das mal hier 🙂

Take a Claudine Hellmuht canvas sheet and put several drops of 2-3 different acrylic paints on it – drops’ size about a pea

Take a brayer and roll the colors out – mixing them – this gives the surface also a nice texture

Let dry- it may crinkle and roll together- that is fine- don’t worry too much about this.

After the Canvas Sheet dried cut out three circles – 2 smaller ones, one bigger one . Also cut approximately 6 stripes each 3 cm / 1.2 inch wide. Peel off the protection backing of the stripes, fold the stripes in the middle lenthwise and stick together. You now have a thin stripe with painting on each side.

Glue the end of one stripe to the middle of one of the cut out canvas circles. Press down hard and then start twisting the canvas stripe in a circle around the center froming a nice flower. Use the glue here and there to make it stick. Cut off peaking out circle piece on the edge if necessary.

Place some peals and crystals on top and place it the flowers on a layout- voila 🙂

Products used:


Prima Workshop – Romantic Grunge – Video & Tutorials

Thank you so much for all those people that joined me yesterday during my first Live With Prima Show – we had people from all over the world – Germany, Singapore, USA, Sweden, Norway, Canada, Spain, England and so much more- it was so fun! The Chat was hilarious as you can tell when you see the recorded version.

Vielen Dank an alle, die gestern mit dabei waren bei meiner ersten Live With Prima Show – wir hatten Zuschauer aus aller Welt – Deutschland, Singapore, den USA, Schweden, Norwegen, Kanada, Spanien, England – und noch viele andere – es hat so Spaß gemacht. Der Live -Chat war zum Schießen, was man wahrscheinlich auch in der aufgenommenen Version hören kann.

Klick 🙂 

I showed how you can create different versions of canvases using the same products and techniques. And besides some “accidents” in the background – like spraying into my “face” (I actually sprayed the part between my neck and my stomach – LOL), a falling canvas onto my head and a demanding cat – all went well- LOL

Ich habe gezeigt, wie man verschiedene Versionen einer Leinwand mit den gleichen Produkten und Techniken kreieren kann. Und außer ein paar Unfällen im Hintergrund – wie zum Beipiel das versehentliche Ansprühen meines “Gesichts” …na ja, ich konnte ja nicht laut rausschreien, dass ich mir in den Ausschnitt gesprüht hatte- LOL – und einer auf mein Kopf fallenden Leinwand, sowie einer rummeckernden Katze – lief es glaube ich ganz gut – LOL.

Here is the tutorial in English as an downloadable pdf Romantic Grunge Tutorial
– which you can print out to go along when you watch the video. It is not a whole Step by Step tutorial – but a short one that lists all you need and the main steps 🙂

Hier ist eine KURZ-Anleitung in Deutsch als Pdf Romantic Grunge Kurzanleitung
Die könnt ihr runterladen und ausdrucken und beim Anschauen des Videos zur Hilfe nehmen. Nicht alles ist so ausführlich erklärt wie im Video – nur die Hauptmaterialien und die Hauptschritte 🙂 aber ich glaube das das in Verbindung klappt 🙂

I hope you liked it ! Have an amazing day and see you soon 🙂

Ich hoffe es hat Euch gefallen ! Habt einen grandiosen Tag und bis hoffentlich bald 🙂

Cocoa Daisy – July: Urban Loft III

This layout is a pretty simpe style for me- but somehow I felt that way with this photo 🙂 And I loved that the Urban Loft Kit was making it possible to scrap in different styles.

*Embrace*

Embrace01


I used the stamp here with white Utee- so much fun.   I also sprinkled with Glimmer Glaze on top of the Cardstock which I used with the non textured side up. The Letters were colored with Glimmer Glaze.

DSC_0716

You just need a non sticky crafting map and then you can place your letters on it.

DSC_0719

Paint it with the glaze.

DSC_0721

And lift the letters up and adhere them to the paper.

Embrace02

Have a wonderful day!

Nat

Foil Pin Wheel *Vintage Street Market*

Maybe you have heard me saying before that I really am not the best gift wrapper – LOL – but with Vintage Street Market I seem to get there. At least one of my best friends was pretty impressed getting for once a present wrapped niceley in the beautiful Party Games Paper.

Vielleicht habt Ihr mich das ja schon mal sagen hören – ich bin echt eine Niete beim Geschenke einpacken – LOL – aber mit den Vintage Street Market Papieren….da klappt das schon ein wenig besser. Zu mindest war eine meiner besten Freundinnen dann doch ziemlich beeindruckt mal ein eingermaßen gerade eingepacktes Geschenk zu bekommen – in dem wunderschönen Party Games Papier.

Foil Pinwheel01

I cut two squares – one from the red Foil Paper of the Party Games Kit and the other one from the teal on in the Dimestore Vogue kit . I used the Scrapbook Adhesives by 3L Adhesive Sheets to put those two square together – an easy way to make sure that even if you bent the foil later the two squares are not coming apart. Then I folded the square two times in half diagonally- so I got four triangles and cut those to the middle. I mounted then one of the sides to the middle where I had adhered an Scrapbook Adhesives by 3L 3D Foam Square.I actually posted a tutorial on how to do a pinwheel in 2006 here

On top of that I put a half pearl. Voila- ready to impress friends 😉

Ich habe zwei Quadrate ausgeschnitten – einmal aus dem roten Folienpapier des Party Games Kits und dann von dem türkisen aus dem Dimestore Vogue Kit.  Eine Anleitung für das Windrad habe ich schon mal hier in 2006 gemacht.

Foil Pinwheel02

Have a wonderful day
Nat